Mount EFS storage on EC2 instance and build Caddy for online file browsing
Pre-requisites
- EFS storage has been created, and the application can successfully write logs to EFS.
- An EC2 instance: to mount the EFS storage directory and setup Caddy.
Step 1: Install the Amazon EFS Client on the EC2 Instance
- Access the instance’s terminal via (SSH) and log in with the appropriate username.
- If the EC2 instance system is an Amazon Linux system
- Run the following command to install the
amazon-efs-utilspackage.
sudo yum install -y amazon-efs-utils
- If the EC2 instance system is Debian or Ubuntu
- To build and install the Debian packages:
    $ sudo apt-get update
    $ sudo apt-get -y install git binutils rustc cargo pkg-config libssl-dev
    $ git clone https://github.com/aws/efs-utils
    $ cd efs-utils
    $ . /build-deb.sh
    $ sudo apt-get -y install . /build/amazon-efs-utils*deb
If your Debian distribution does not provide rust or cargo packages, or if your distribution provides versions earlier than 1.68, then you can install rust and cargo via rustup:
    curl --proto '=https' --tlsv1.2 -sSf https://sh.rustup.rs | sh
    . "$HOME/.cargo/env"
- If you have any problems with the installation please refer to documentation
Step 2: Create a directory to mount EFS
- Create the directory efs as a file system mount point with the following command
sudo mkdir efs
- Mount EFS using the following command
sudo mount -t efs -o tls fs-0bbb30c3d8cefacb1:/ efs
Note: fs-0bbb30c3d8cefacb1 is the EFS ID.
Step 3: Installing Caddy
The following are examples of Ubuntu installation commands only, for other systems refer to documentation
sudo apt install -y debian-keyring debian-archive-keyring apt-transport-https curl
curl -1sLf 'https://dl.cloudsmith.io/public/caddy/stable/gpg.key' | sudo gpg --dearmor -o /usr/share/keyrings/caddy-stable-archive-keyring .gpg
curl -1sLf 'https://dl.cloudsmith.io/public/caddy/stable/debian.deb.txt' | sudo tee /etc/apt/sources.list.d/caddy-stable.list
sudo apt update
sudo apt install caddy
Step 4: Configure CaddyFile and start Caddy
- Create a
Caddyfilefile and enter the following, as described in documentation
vpn.great-way.link {
        root * /home/admin/efs
        file_server browse
        basic_auth {
                admin $2a$14$NLRgL1aezQg6IkDQCWnESeUo6U1RRNqsN6mSk.9EvhRBTqq39Tdc2
        }
}
**Note: **.
vpn.great-way.linkis the domain name pointing to the IP of this EC2 instance, which Caddy automatically configures for SSl certificates and HTTPS access.root * /home/admin/efswhere/home/admin/efsis the directory where EFS is mounted.file_server browseis set as the file browse service.basic_authenables basic authentication,adminis the username,$2a$14$NLRgL1aezQg6IkDQCWnESeUo6U1RRNqsN6mSk.9EvhRBTqq39Tdc2is the commandcaddy hash-password -p password. For the encrypted password, refer to the documentation basic_auth caddy hash-password /docs/command-line#caddy-hash-password)
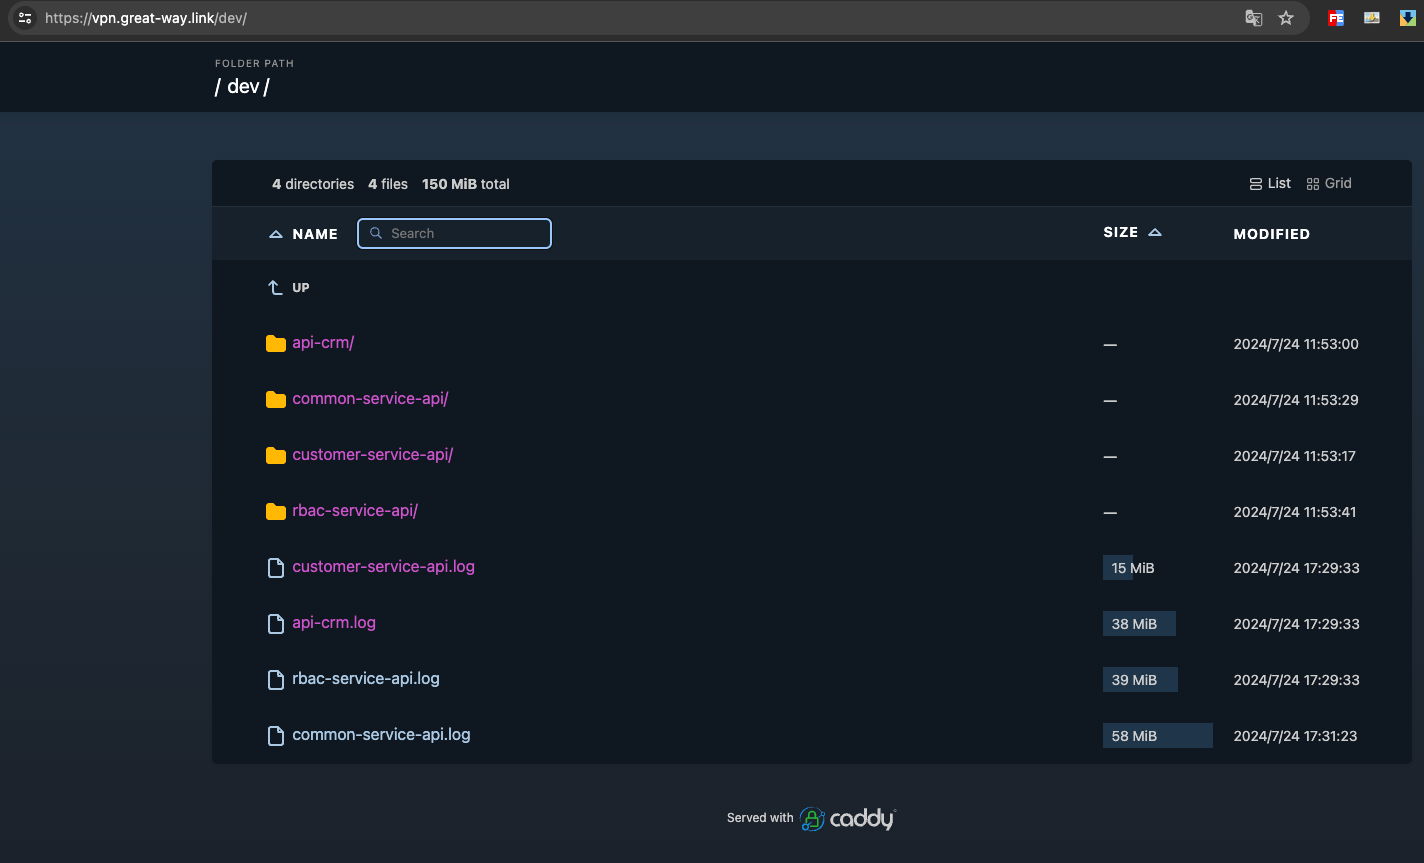
Step 5: Access the configured domain name and browse the file online
Open the vpn.great-way.link address in your browser and enter your username and password to access the